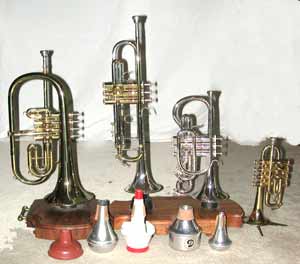
What You Need To Know About The Trumpet


The trumpet is said to have originated from Egypt. In the medieval times, the trumpet was used for military purposes. The players were guardedcarefully as they were the only ones who could transfer signals across distances and different section of the troops. By 1830 however, trumpets werealso used for music and entertainment. This was after the invention of the valve.


How is it constructed? The trumpet is a brass tube bent into a spiral.The bore is cylindrical. If we look at it closer however, it is a complex series of tapers, smaller at the mouthpiece receiver and larger just before theflare of the bell begins. The careful design of these tapers is critical to the clarity of the instrument.


So how exactly is the sound produced? Well, blowing air through closed lips, producing a buzzing sound into the mouthpiece, produces sound. This isdesigned with comfort in mind. Circular in shape, it is easy on the lips.


To learn and perfect any instrument, hard work on its principals and techniques is required. The same goes for trumpets. Some of the greatest trumpet players put in hours every day practicing their trumpets on high notes. They also go through many breathing exercises to strengthen theirabdominal muscles to take the load of the instrument.


For a smooth experience of playing the trumpet, there are some tips that one needs to keep in mind:


You must Breath properly

By this I mean that the breathing should be from the abdomen and supported with the centralized body weight.


If too much weight or pressure is put onthe diaphragm or the group of muscles in the upper part of the body, then bleeding and pain can give a player lot of problems.


Control and practice

Lips, tongue and facial muscles need to be exercised so that too much pressure is not born by the lips.


At all costs, bad habits must be avoided.Habits like bad posture, a tense attitude, throat tightening and extra pressure on the mouth piece must be avoided. These habits can cause lowplaying time and even pain.


To play for any period of time, a trumpeter needs to develop circular breathing. Any other form is not suitable for this kind of instrument. So beforetaking on trumpet, it is recommended that breathing and other facial techniques are practiced. Today, trumpet is used in nearly all forms of music. Classical, funk, folk and pop all use trumpets to give a glad and joyous note to the music. Some ofthe greatest trumpet players include Maurice Andr?, Louis Armstrong, Miles Davis, Jon Faddis and Maynard Ferguson.


Since the days when trumpeters were guarded strictly for their value as signalers, this instrument has always been intriguing. It is more so today withdifferent musicians coming out with their method of playing the instrument. New techniques for playing and mastering trumpet are being discoveredmaking the field an exciting and fresh to get into.


3 Tips To Keep in Mind When You Perform Publicly


Most people are terrified of performing in front of an audience. What we call "stage phobia" is perhaps one of the most prevalent fears that a lot of us have suffered from at one point of time (and most still continue to). We can sing, dance, act, or play a music instrument effortlessly when we are alone or in the company of a few strangers. But when we are asked to do the same in front of a large crowd, most of us tend to panic and perform well below our skill level.

If you've ever found yourself in a situation when you've had to play a musical instrument, sing, dance, or act before a crowd only to have your legs freeze and your body panic, you'll find these three tips useful in delivering a great performance the next time you're on stage:

1. Practice. I know this sounds very redundant, but the amount of people who end up on stage without ever properly knowing their instrument (your voice, your guitar/piano/drums, or your feet if you dance) is simply amazing. If you're singing a song, don't just rehearse it once or twice; practice it dozens of times until it feels like second nature. The number of hours you put into your daily practice is what separates the professionals from the amateurs.

2. Never, ever back up. If you miss or mess up a section of a song, or if your voice falters at a crucial chorus, don't ever back up and try and correct your mistake. The first rule of performing on stage is to keep going on, no matter what. You might have seen online videos of professional musicians performing ever after slipping on stage and falling down. Being able to pick up and continue after a mistake is a key trait of professional performers, and one that you must try and pick up.

3. Don't be obsessed with your technique. Face it: some of your notes won't sound that well, you will hit the wrong key at some point in your song, and your voice might falter at some point. Many times, a mistake while playing can make your performance appear more authentic and genuine. What's important is to see how your performance appeared as a whole:

Author: georgerydley

Don't Move A Piano Until You Read This


How do you move a piano? Very carefully. Okay, I’m being a little sarcastic, but moving a piano is a serious endeavor. I’m a big advocate of hiring a professional mover to move a piano. Pianos are heavy and it’s easy to damage a piano while moving it. I’m speaking from experience. I own a Kimball piano my parents bought brand new for me when I was a child. That piano was a big deal to me after having played on an old “clunker” of a piano for several years. I played that new piano every day.
When I got married it was time to move the piano to my own home. My husband and his brothers moved it themselves. It wasn’t an easy job even with the moving dolly they used (pianos weigh several hundred pounds – grand pianos can weigh 1,500 pounds). The amateur move of my piano resulted in both of the piano legs being damaged (a common occurrence when people move a piano themselves) and some unplanned internal work (some pins needed repair and a string broke). I should have hired a piano mover. Then I wouldn’t have had those problems, but my husband and I thought we would save money by doing it ourselves. It was a lesson I should have remembered, but I was foolish a second time.
A few years ago my husband and I built a new house. When it came time to move the piano again, my husband was reluctant to hire someone to move it professionally because our pocketbook was already feeling empty from the expense of building the house (he called our new house a “money-sucking black hole.”) In his mind, moving it wasn’t a big deal. Our new house was less than two miles from our old one; and he had a dolly, a trailer, and a brother who was willing to help him.
Everything went okay until my husband turned into the driveway of our new home. The sharpness of the turn strained the ropes holding the piano on the trailer and they broke. The piano tipped over and sustained a lot of damage (the entire “guts” of the piano are ruined and the case is chipped and scratched). I haven’t had it fixed yet, but I have gotten an estimate. It’s going to take a lot of time and money to fix the piano. It needs to be totally rebuilt. Because of the labor involved, it would be cheaper to buy a new piano than have it fixed, but the piano has a lot of sentimental value to me so I will have it fixed. This is why I say, “Hire a professional!”
What does a professional piano mover do to ensure a safe and successful move? With upright pianos, they almost always strap the piano on a skid called a piano board. They also cover the piano with blankets to help protect it. The entire bundle is then typically put on a dolly and taken to its destination. If steps are involved, the piano is taken off the dolly and slid up or down the steps on the piano board.
Moving a grand piano is a little more involved. The lid, lid hinges, pedal lyre, and leg on the straight side of the piano are usually all removed. The piano is then put on the piano board, on its side, with the straight side down. The other legs of the piano are then removed. The piano is then covered with blankets, strapped to the board, and put on a dolly.
Some movers don’t like to move a piano up or down stairs. If it’s feasible, they prefer to hoist it to the appropriate floor via a window that’s big enough to accommodate the piano. So what do you do if you just want to move your piano from one part of a room to another? First, decide if it’s really important to move it because there’s always the risk of damaging a piano even with a short move. Piano legs are the most likely thing to get damaged or broken.
Be very careful to avoid putting too much weight on the legs. Get a few strong people to help if the piano is an upright; and get at least 5 people if it’s a grand piano. With an upright or spinet, tilt the piano back a little to take the pressure off the front legs, but be careful not to tip it back too far and tip it over. With a grand piano, lift the piano up enough to get the pressure off the legs before you try to move it. It’s not necessary (and not recommended) to lift the piano off the floor entirely. If you’re going to move a piano often, consider having it fitted with special casters that will allow you to move the piano fairly easily. Or, have the piano placed on a piano truck. How you do you find a good piano mover if you’ve decided to not try and move it yourself? My suggestion is that you call your local piano store and ask them for recommendations. They should be able to give you the name or names of reputable movers in your area. Okay, so you’ve decided you are definitely going to move your piano and you’ve decided on a method. Now you have to figure out where you’re going to put the piano. Where should it go? Try to put your piano in an area of a room where there are little or no drafts, where it’s out of direct sunlight, and where the temperature and humidity are stable. This is because pianos are sensitive to humidity and temperature. Lots of temperature and humidity swings cause a piano to go out of tune faster than normal, can damage the wood case, and if they are severe they can even eventually cause structural failure. Don’t place your piano over or next to a heat vent and avoid putting it close to a fireplace. Don’t put in front of a window because that’s typically a drafty place as well as one with direct sunlight. Try to find a room in your home or apartment that has consistently stable temperature and humidity. That is the best room for your piano. If you can’t find a place in your apartment or home that is out of direct sunlight, free of drafts, and doesn’t have big temperature swings, you may want to consider having a climate control system installed in your piano.
Moving and placing your piano correctly will help ensure you have a lovely instrument to play for a long time rather than having what I now own – an oversized paperweight that needs to be dusted.


Finding a Junior Drum Set for Your Child Drummer


Junior drum sets, also often known as starter drum sets or kids drum sets, are small sized drum kits that serve a useful purpose as learning instruments suitable for young children and good deal for parents. As opposed to drum sets that you buy in a toy store (that really are ‘toys’), a junior drum set is an actual instrument that plays quality sound and are durable enough to take the beating of a young drummer. Buying a junior drum set for a child player will help them play drums using a real instrument, which in turn will help them develop a passion for drums while at the same time learn drumming techniques and have fun.

What is also great about junior or starter drum sets is that even though they are high quality instruments, they are usually affordable. There are enough on the market now that you can generally find one for between $100 and $150. This is far less than the many hundred dollars you would pay for a real drum kit. Plus, child drum kits usually come with all the accessories needed to start drumming right away, like drum sticks, bass pedal, throne (drumming seat), and drum key. This means young drummers can usually start drumming right away once they purchase their kit.

There are junior drum kits in a variety of style, but generally choosing one is relatively easy. Kids drum sets are normally first categorized by how many ‘drums’ are in the kit. You’ll find 3-piece, 4-piece, and 5-piece junior drum sets, which really defines how many tom-tom drums come with the set in addition to the bass drum and snare drum. Any of these configurations are great for a young drummer to start drumming, its just a matter of personal preference and budget. Junior drum sets also come with cymbals and a high-hat to complete the drum set components.

There are also different size child drum sets, and most will indicate the age appropriateness for each set. You’ll find small sets made for children ages 3-7, then sets for ages 7-10. Some of the larger junior drum sets are suitable for children all the way into their teenage years, which they will use as long as they are fond of drumming and until they are ready to upgrade to a full set. These junior drum sets will also last many years as well, as the main parts that wear down are the drum heads which are easily replaced.

Finding a great drum set for kids is relatively simple as well. Many major musical instruments manufacturers who offer drums will also make junior drum kits as part of their product offerings, and as mentioned they are generally affordable. You will find some upscale junior sets with more features that cost more. However another option is buying a used junior drum set. Since young drummers are always upgrading to full kits, and because their junior drum kits are usually still playable, there are always plenty of used drum kits on the market. Looking on eBay for used junior drum sets is a smart place for parents to find their child’s first drum set.

So if you can stand the noise of your child enjoying his new drum kit, but are willing to introducing him to the new world of drumming, then choose a junior drum set and get them started off in the right direction.

3 Tips For Buying a Childrens Electric Guitar


Many children would like to learn to play the electric guitar. However, often their parents won't allow them to because the find the cost of the instruments quite prohibitive. For those whose budgets are limited it is worth considering purchasing a used children's electric guitar instead.
In this article we provide a number of tips that may prove useful when purchasing a used electric guitar for your child.

1. It is important that you inspect the instrument very carefully before you make that all important purchase. Especially make sure that your check that the neck of the instrument is not twisted. The easiest way to do this is by inspecting the strings to see how close they are tied to the fret board. If they are tied closely to the fret board and have a wide gap in the middle this clearly shows that the neck is warped. When the guitar is warped playing it becomes a lot more difficult as the positioning of the hand on the strings is hard.

2. Along with checking to see if the neck of the electric guitar is twisted look at the main body of the instrument front and back. Although most guitars will have a few scratches on them this is fine but if they go deep into the instrument or you notice some large marks on around the edges this shows the instrument has not been cared for properly. Unfortunately the sound such instruments produce won't be as clear as it should be.

3. Also when buying a used electric guitar check to see if it can be plugged into an amplifier and if so what sort is required. An amplifier is needed with this instrument in order that when played it produces good quality chords.